
By now we should have 4 VMs, snapshotted and waiting.
We should also have a somewhat coherent understanding of how networks work.
To conclude the current chapter, we will now create an isolated network and wire up our machines.
Creating the Network
-
On VMware go to "File" and click "Virtual Network Editor".
-
You may be required to provide Administrative permissions.
-
Click "Add Network".
-
Create a new network entry.
-
Rename it to something meaningful, e.g. "OOTW".
-
Adapter should be "Host-only" - this way the network is isolated from the world.
-
Disable "Use local DHCP" - this way we can configure the machines to have static IP addresses.
-
Set the subnet IP to "10.10.10.0" and the netmask to "255.255.255.0".
Now go through the VMs and switch the NAT adapter with the new one ("Custom: OOTW").
Assigning Static IP on Linux
We now need to assign static IPs to our machines.
It is completely irrelevant what IPs you prefer personally, you can do whatever you want, but I recommend following some sort of pattern.
Kali
- Enumerate the name of the driver. Given the fresh installation you should have two drivers - one is
lo(loopback), and the other is the one you need. In my case it iseth0.
┌──(kali㉿kali)-[~]
└─$ ip a
1: lo: <LOOPBACK,UP,LOWER_UP> mtu 65536 qdisc noqueue state UNKNOWN group default qlen 1000
    link/loopback 00:00:00:00:00:00 brd 00:00:00:00:00:00
    inet 127.0.0.1/8 scope host lo
       valid_lft forever preferred_lft forever
    inet6 ::1/128 scope host noprefixroute
       valid_lft forever preferred_lft forever
2: eth0: <BROADCAST,MULTICAST,UP,LOWER_UP> mtu 1500 qdisc fq_codel state UP group default qlen 1000
    link/ether 00:0c:29:32:52:3a brd ff:ff:ff:ff:ff:ff
    inet6 fe80::20c:29ff:fe32:523a/64 scope link noprefixroute
       valid_lft forever preferred_lft forever
- Open the network interfaces file in a text editor (needs privileges). For example:
sudo nano /etc/network/interfaces
- Paste in the following template. This tells the network service to use this IP constantly:
auto eth0
iface eth0 inet static
    address 10.10.10.100
    netmask 255.255.255.0
-
Save and exit (e.g. in
nanoit is:CTRL+S,CTRL+X) -
Flush the old assigned IP (if needed, but it will most likely already be flushed after changing adapters):
sudo ip addr flush dev eth0
- Restart the networking service:
sudo systemctl restart networking
Example on my Kali:
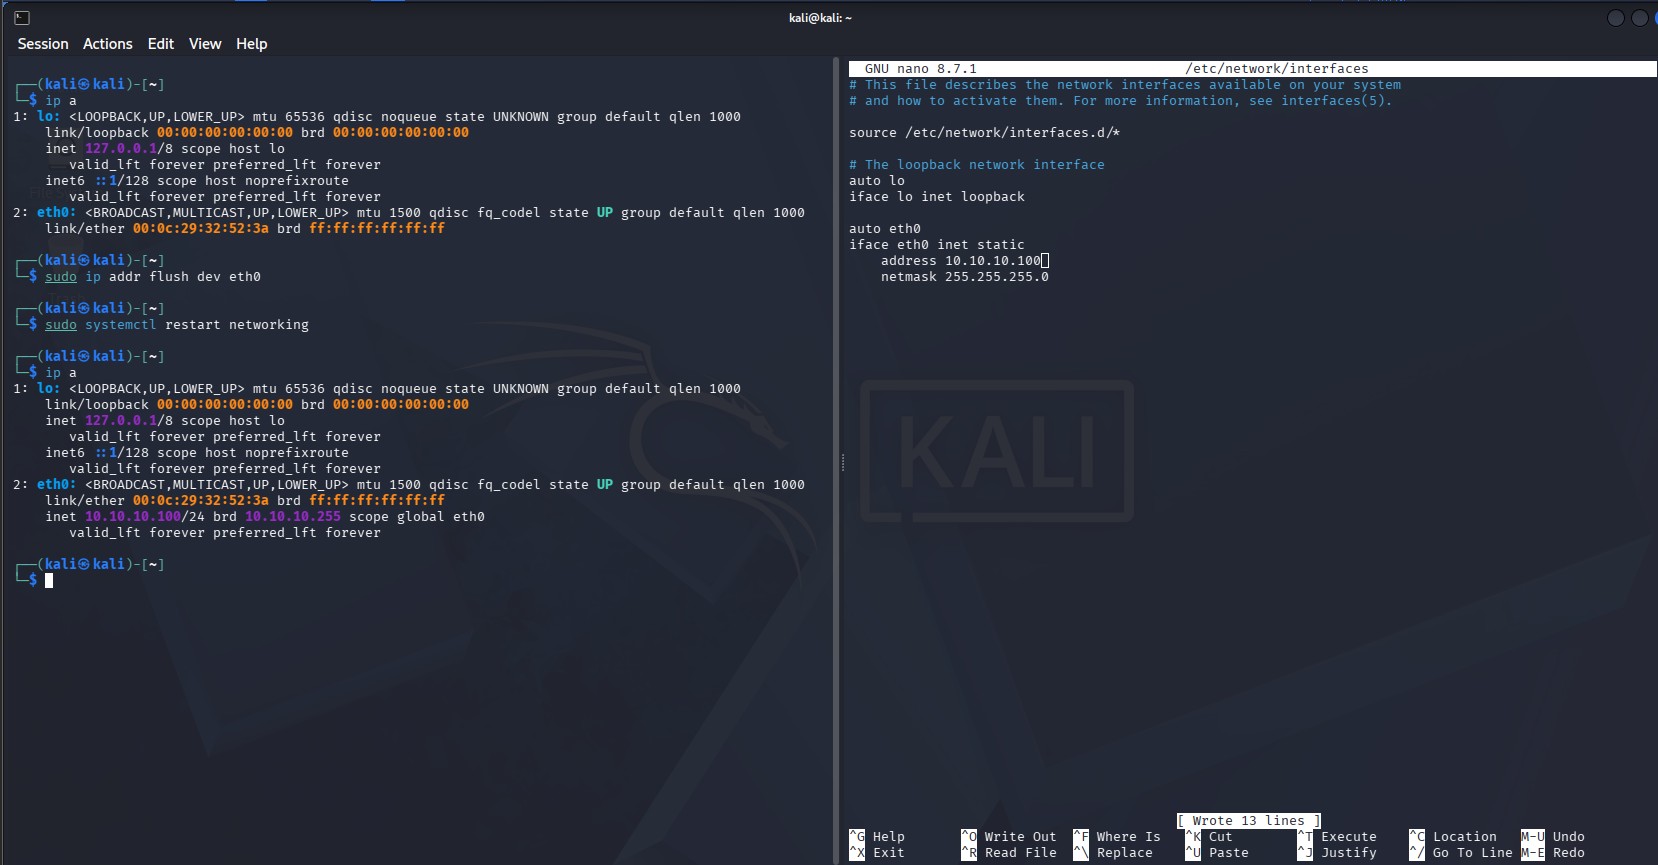
You can repeat the exact same steps on Ubuntu, just use a different IP.
Ubuntu
Ubuntu uses Netplan, so the setup will be slightly different.
Also, my device name is ens33 and I will use .10.
- Enumerate your devices:
ip a
- List the available Netplan configuration files, then open the one present on your system:
ls /etc/netplan/*.yaml
sudo nano /etc/netplan/<your-file>.yaml
- Use the following template:
network:
  version: 2
  renderer: NetworkManager
  ethernets:
    ens33:
      dhcp4: false
      addresses:
        - 10.10.10.10/24
- Apply it:
sudo netplan apply
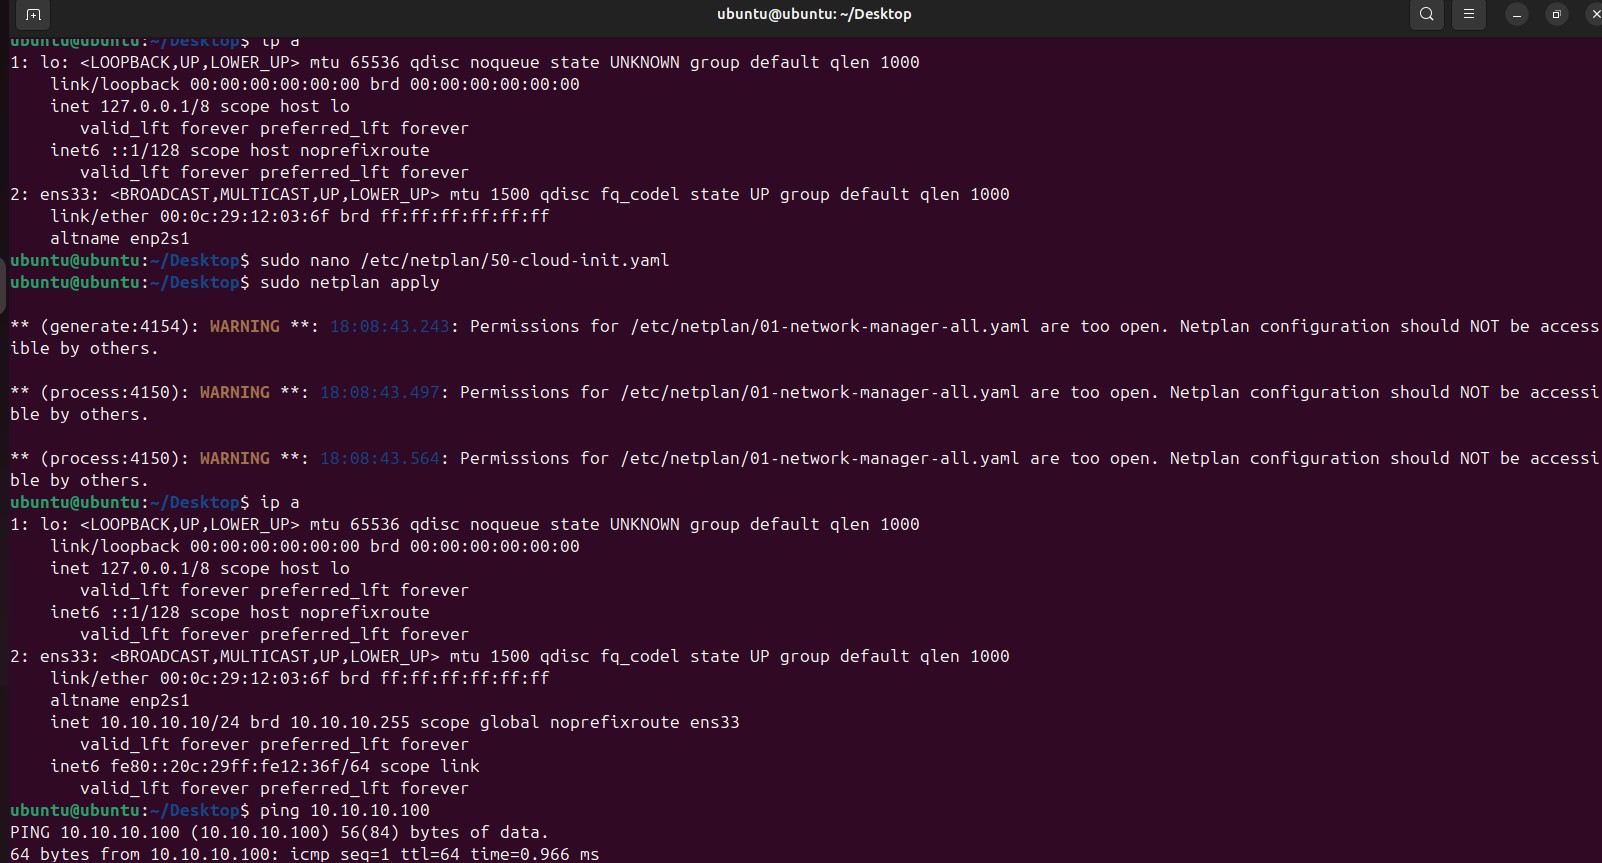
As you can see from the screenshot, I even managed to ping Kali (10.10.10.100) and get a response back.
Windows Workstation (Win10)
Assigning a static IP to a Windows machine is very straightforward.
-
Click
WIN+R(WIN as in the "Windows Key") -
Type
ncpa.cpl -
You should see your adapter options
-
Right click on the relevant adapter
-
Click
Properties -
Select with a Left Click
Internet Protocol Version 4 (TCP/IPv4) -
Click
Properties -
Use the following IP address:
10.10.10.201
255.255.255.0
<blank gateway / doesn't matter for a lab>
- Use the following DNS server (here we put the IP of the Domain Controller):
10.10.10.200
<blank alternate server>
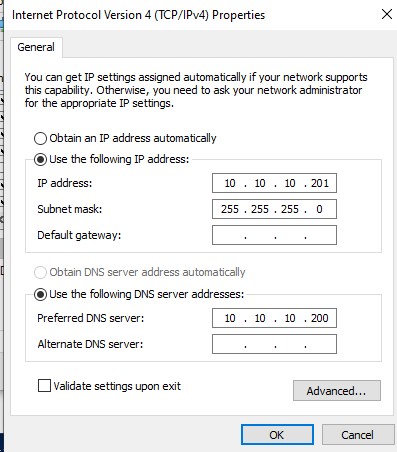
Windows Server
Following the exact same steps, but make sure to put:
- Use the following IP address:
10.10.10.200
255.255.255.0
- Use the following DNS server (put the SAME IP - e.g. the DC uses itself for DNS)
10.10.10.200
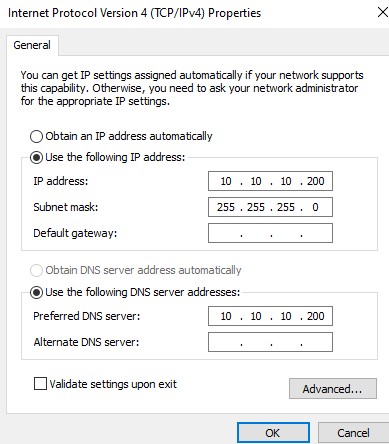
Snapshots
Once you've wired up the machines and verified connectivity (keep in mind that Windows default Firewall is very strict on Inbound traffic but typically allows Outbound e.g. to Kali in our case), shut down everything and take snapshots and name them "CONNECTED" or something meaningful.