
Kali is a widely recognized distribution of Linux which ships with a lot of security-centric tools pre-installed. Although many people download a pre-built Virtual Machine image, I personally prefer to download the installer ISO and go over the process myself:
-
Download the ISO
-
Verify that the SHA256 hash of the downloaded ISO matches the one on the website. It is subject to change.
PS C:\Users\PC\Downloads> Get-FileHash -Algorithm SHA256 -Path .\kali-linux-2026.1-installer-amd64.iso

Algorithm       Hash                                                                   Path
---------       ----                                                                   ----
SHA256          271477AD6EA2676C7346576971B9ACC2D32FABD9C2BBAF0E6302397626149306       C:\Users\PC\Downloads\kali-linux-2026.1-installer-amd64.iso

PS C:\Users\PC\Downloads>
-
Head over to VMware (or whatever software you are using) and create a "New Virtual Machine". Select "Typical" (don't need "Custom").
-
Click "I will install the OS later" (can save you from headaches sooner or later, trust me).
-
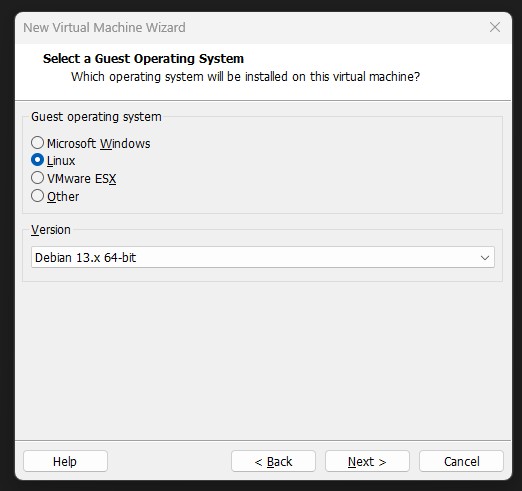
Kali is based on Debian. When prompted for the "Guest OS", select "Debian 13 x64" or similar.
-
Give it a name and location (I prefer to make a base directory such as "OOTW/VM" and keep dedicated VMs centralized).
-
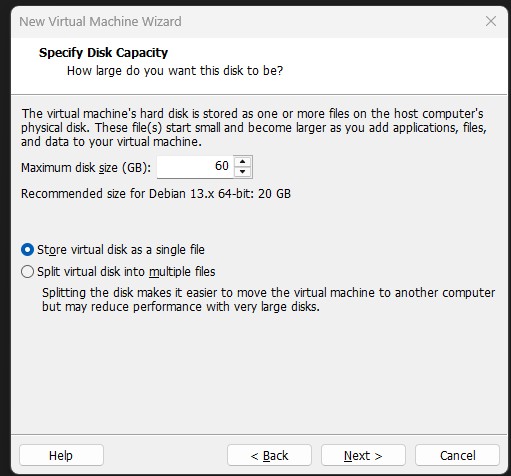
Minimum 60gb of memory and opt to store the disk as "a single file".
- On the next screen, click "Customize settings". Note that one CPU with more cores, or two CPUs with one core are far better than using something like 4x4 (it will NOT make your VM run better, in fact it will run worse). I usually put on my VM 16gb RAM, 1 CPU with 8 cores and 120GB storage. In any case, the following is the minimal settings I would recommend:
Kali VM
OS Type: Linux
Version: Debian 13 64-bit
RAM: 4 GB+
CPU: 2 vCPU+
Disk: 60 GB Thin Provisioned
-
Leave the network adapter as NAT for now (we'll deal with that later).
-
Click "Accelerate 3D Graphics" and set graphics memory to 512 mb (or the maximum you can in VirtualBox).
-
Once the VM is created, go to its settings and load the Kali ISO in the DVD component.
-
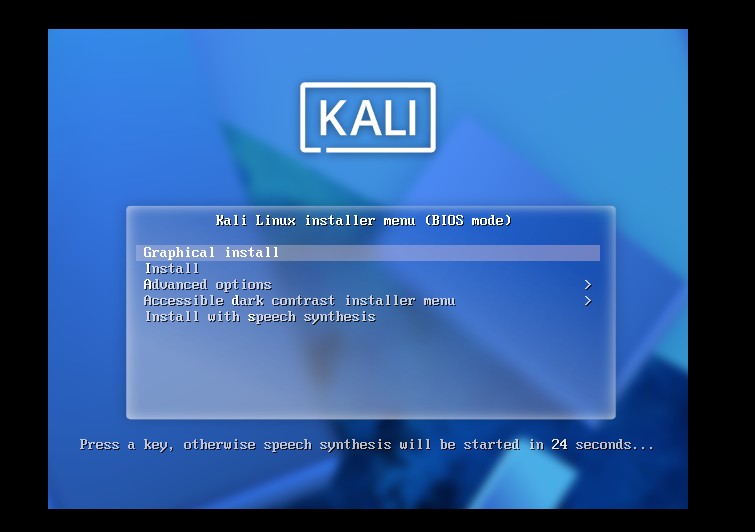
Boot the VM - you should be greeted (and probably startled by the beep sound) with this fancy installer:
-
Stick to defaults (e.g. English, US, etc.), put "kali" everywhere (including user and password), domain "localdomain" or whatever is default, configure your timezone and so on. If unsure, stick to defaults.
-
For partitioning, use "guided - entire disk" - select the only disk you have. All files in one partition. Just keep going on with defaults.
-
Install GRUB boot manager and use
/dev/sda(or whatever your device is called). -
On the final screen, remove the DVD device from the VM and then click "continue" (to reboot).
You may now login with the credentials:
kali:kali
- Install VM guest tools
For VMware:
sudo apt update && sudo apt install -y open-vm-tools open-vm-tools-desktop

sudo systemctl enable --now vmtoolsd
For VirtualBox:
sudo apt update && sudo apt install -y virtualbox-guest-utils virtualbox-guest-x11 virtualbox-guest-dkms

sudo systemctl enable --now vboxservice
- Shut it down and create a snapshot called "FRESH".
This snapshot provides a clean baseline which can be restored later if something inevitably catches fire. Ensure this snapshot is AFTER the machine is turned off - that way you can clone the machine directly from this snapshot.